Sunday, January 16, 2011

Picture effects

What I'm going to post is about the picture effects.


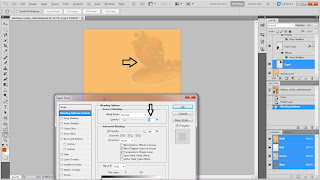
Firstly, I select a chocolate picture layer.


Next, double click on the layer to add drop shadow effect.


Select another chocolate layer and do the same.


This time, add another chocolate layer and make the opacity to 16%.
It's like a perspective view.


Next, copy a chocolate layer then paste it again.
Add some drop shadow effect and lighten the opacity to 21%.
This makes it looks like a shadow.


After that, copy another layer and paste it again.
Opacity changed to 11% so that it looks faded.


Next calendar,
Add drop shadow effect to both of the cup chocolates.


Next, copy both layers and change the opacity to 30% on both cups.
This makes it looks like a shadow from the front.


Next, add another layer of chocolate and this time, the opacity changes to 13%.


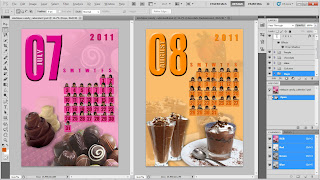
After all that is done, this is my final calendar at the bottom.
July & August XD

Wednesday, January 12, 2011

Month of JANUARY and FEBRUARY which done by Jan

JANUARY

FEBRUARY

Steps of the calendar layout

First, we crop out our photos by using the selection tool and edit in quick mask mode by brush tool. Then, we arrange in the order on the colour background which we in charge of as shown below.
Besides, we will put some effect on it by using the blending options of each layer.

Then, we will place the boxes for each of the date. It will be place like our hand is holding the boxes.

It is time to put the date on the boxes, some effect will do on each every date.

Month, week and year will be layout on the calendar later on. There will be some effect too on it.


Below are the final layout of the month, week and year of the calendar. 


We have selected some photos of dessert from Google. We crop out the dessert and place it on the calendar. Some of the dessert may be place as background in a low opacity as shown below.


However, some original photos will be place too.

Finally, the layout of the calendar have done.


Since we are in charge in different color of the calendar, so the above background color is just one of the color which in charge by me.
Besides, the arrangement of the date, week, text, boxes and dessert are not specific, we may prefer our own design on the layout of the calendar. Same case, the above layout that shown is just one of the layout.

That's all. Thank you ^^

Text Effect

In our calendar , we have use some effect to enhance the text in our calendar to avoid the texts become boring and not attractive.
we apply the effect in:-


1)our month text   * month text and number *


----------------------------------------steps of applying the effect------------------------------------------------
1)double click the layer * 11 * , a layer style window will pop out.Next,go to blending option:custome  


2)Next,go to blending option:custome and change the structure and shading value after clicking the bevel and emboss. after changing,click * ok * .

***same steps is apply on the layer *11* , *12 * and *December*.

3)go back to the  LAYERS bar and then adjust the opacity of the layer * 11 * to 71% then it is all done.


2)Days ( S,M,T,W,T,F,S)


----------------------------------------steps of applying the effect------------------------------------------------


1)Firstly double click the layer * S * ,layer style window will pop out again.


2)Next,go to blending option:custome and change the structure and shading value.Now go to the drop shadow  and bevel and emboss then change the  value that we want.
after that click * ok *.

***same steps is apply on layer  M,T,W,T,F and S


 3)The 2011 number 


----------------------------------------steps of applying the effect------------------------------------------------

1)double click the layer 2011 a layer style window pop up.

2)go to drop shadow and structure value is change to what we want. Then  click *ok *

4)The days in the smal square box ( 1, 2,3,4,5,6,7,8,9.....)


----------------------------------------steps of applying the effect------------------------------------------------


1)Double click the layer * 1 * ,layer style window will pop out again.


2)go to the bevel and emboss and change the structure value that we want.Then click * ok *

****same steps is apply on layer 2,3,4,5,6,7,8,9,10.......31 by duplicating the layer to reduce the time taken to create the layer and by changing the days .


kayli leng- may & jun


This is the the final calender that i make.

i drop shadow on the pudding

the numbers i use bevel & emboss to create.
i use outer bevel and direction down.
so it look like stick on the box.

Tuesday, January 11, 2011

finally i done my calendar


september


october

--------------------------------------------------------------------------

step


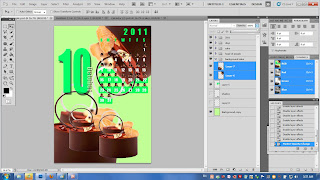
First, I put the green color be my background.


Next, I put the 31 small triangles.


Then, I open my picture.


I used quick selection tool to cut my background


And then, I put all my group members’ picture on the top of the small box.


Next, I type 2010, weekend (Monday until Sunday) and days of the month


Then, I type 10


and make some effect.


After that, I type October


and also make some effect.


Next, I open cake picture and put into my calendar.


Then, I open same cake picture be my background


and adjust the opacity to 39%.


Finally, I done my calendar^^